
Hello friends! Today I am going to show you an awesome effect you can do in Photoshop that it is applicable to many different kind of pictures.

For this project you start by choosing whatever picture you like and upload it to photoshop.
- Once uploaded, select the figure (in my case the dancer) and remove it from the background into a separate layer.
- In the background layer, select the now empty space where the dancer was and go to Edit> Fill >content aware.
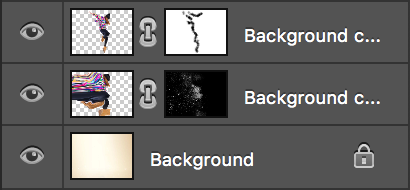
- Duplicate the layer where you only have the dancer
[Now you have two layers with only the dancer and a background with no dancer] - On the top layer, apply a mask
- On the layer right below that one, apply another mask and fill it with black (Edit> Fill> Black)
- This is what you should have now:

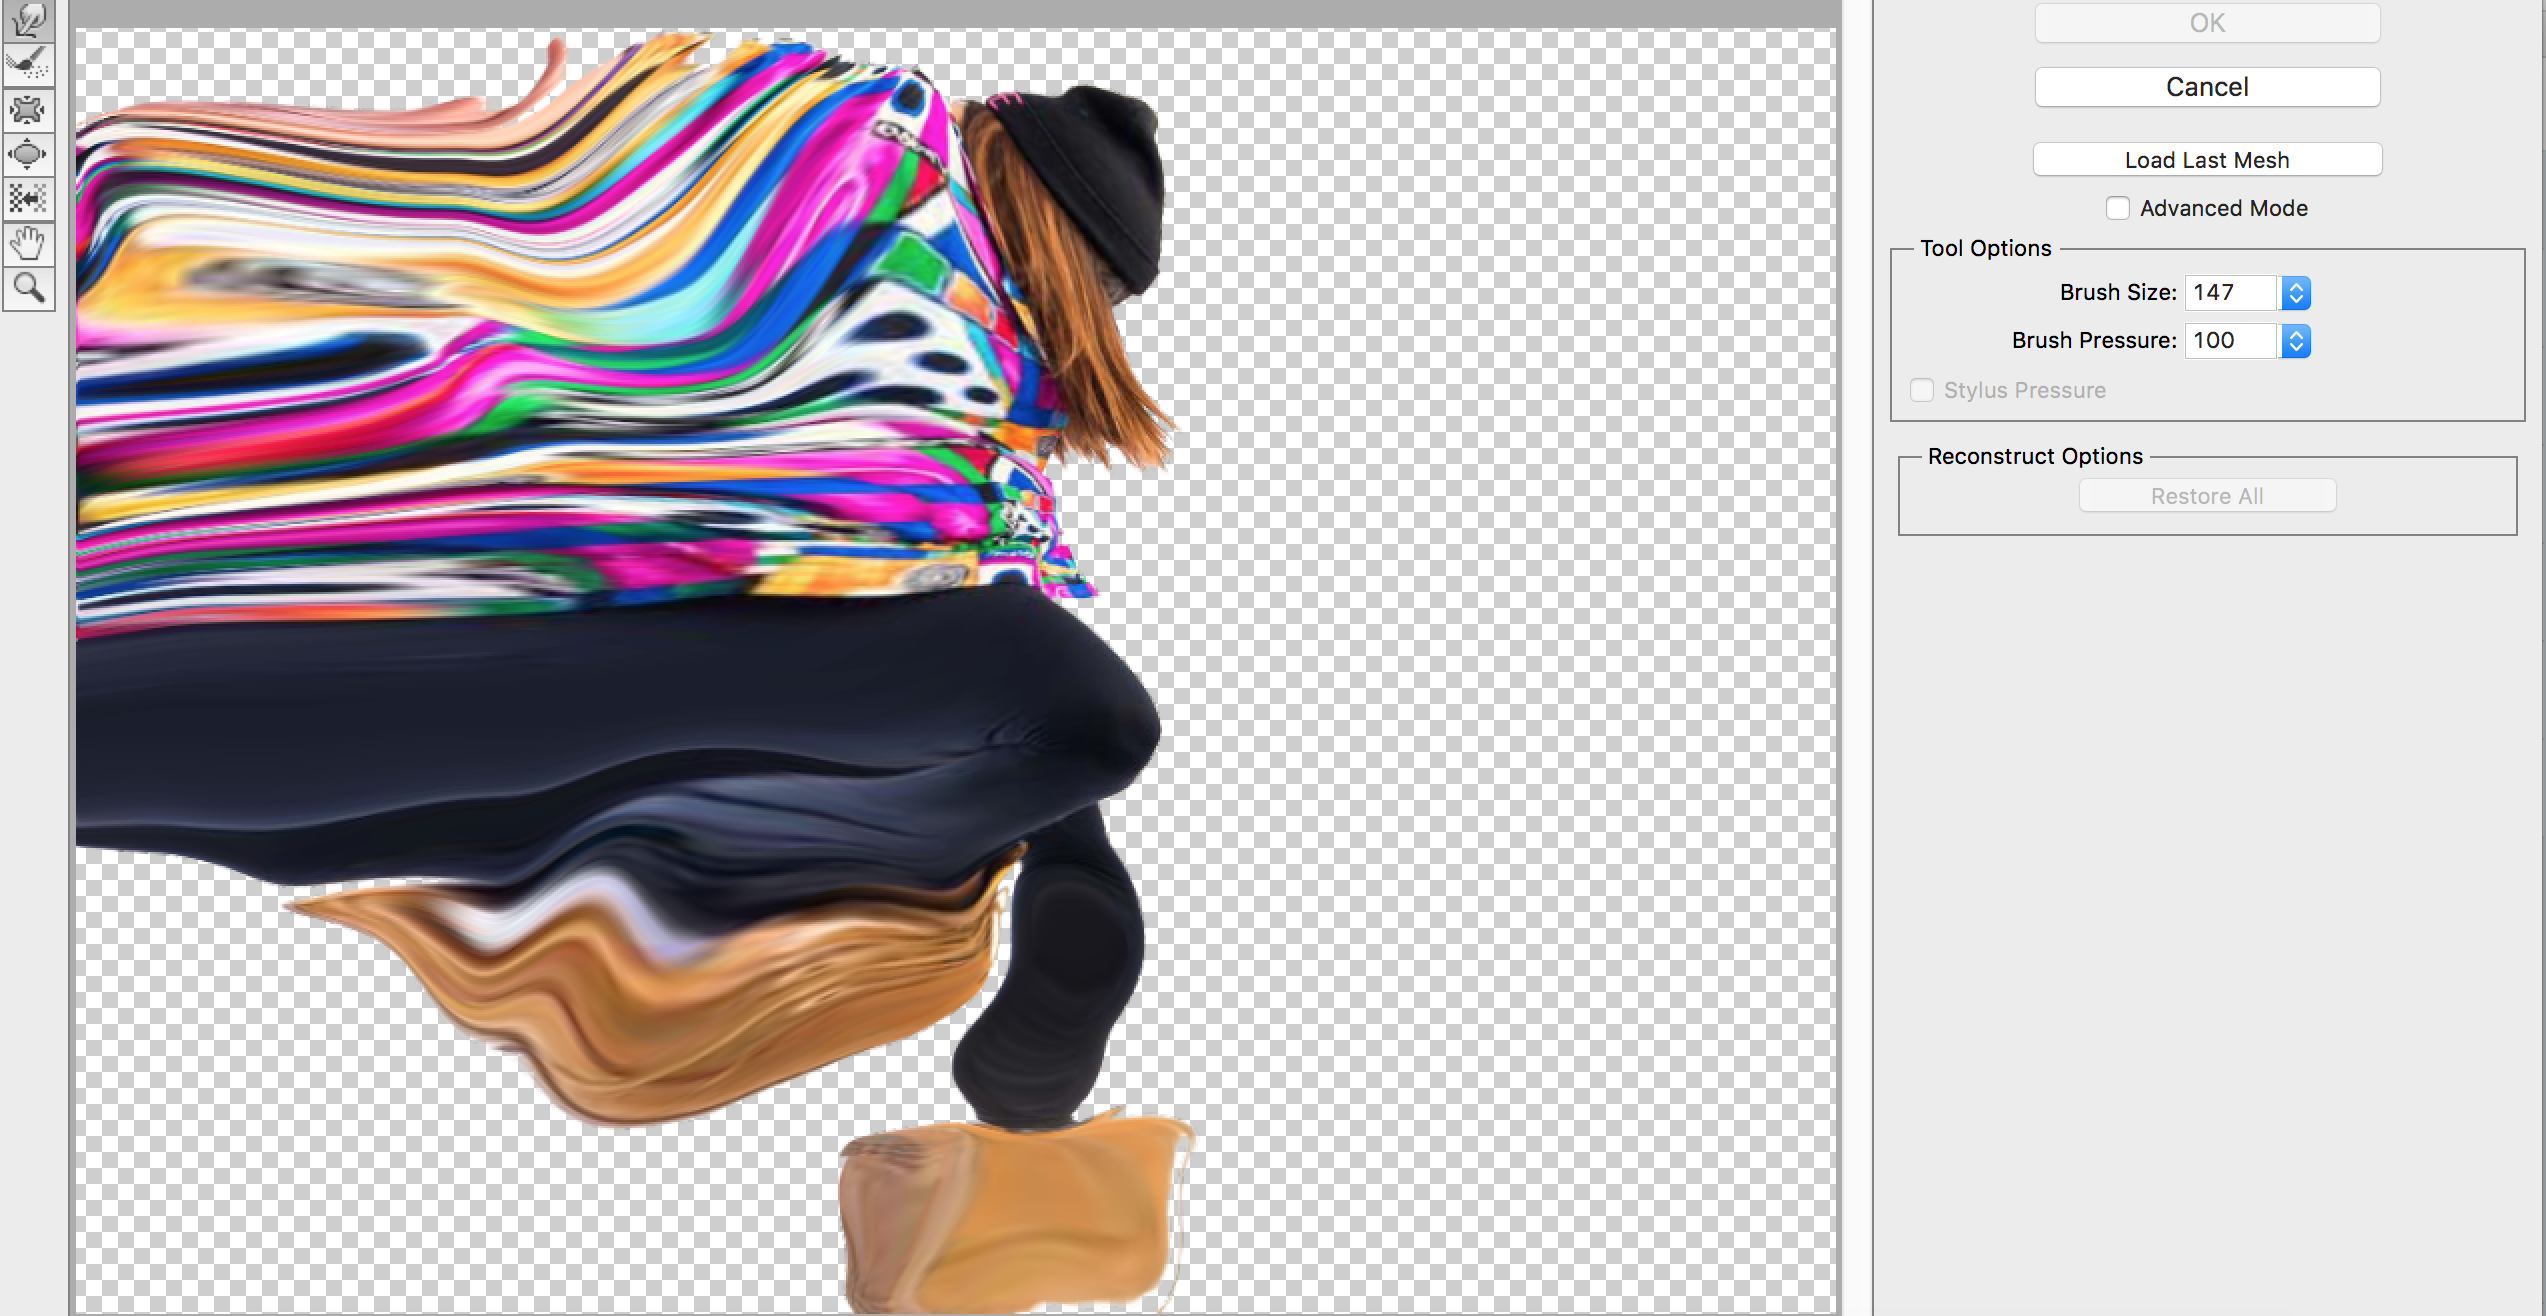
- While in the layer with the black mask, go to Filter> Liquify and with the Forward Wrap Tool make it so it looks something like this:
- Click ok and go to the top layer mask, and with a black brush of your like start “removing” the borders of the figure where the dispersion will be
- When you like your result, go to the layer mask underneath and with a white brush, start applying the dispersion where you liquified previously. Should look something like this:
- You are done!
I hope you liked my tutorial with pictures to help go through the steps.
Hey fantastic website! Does running a blog such as this require a lot of work? I’ve very little expertise in computer programming but I was hoping to start my own blog soon. Anyways, should you have any suggestions or tips for new blog owners please share. I know this is off topic but I simply wanted to ask. Cheers!| а
https://waterfallmagazine.com
This paragraph is actually a pleasant one it
assists new net users, who are wishing for blogging.
What a stuff of un-ambiguity and preserveness of valuable know-how on the
topic of unexpected emotions.