 Chose a picture of your likeness and upload it into Adobe Photoshop.
- Select only the figure. In this example is me playing tennis without the background or ball.
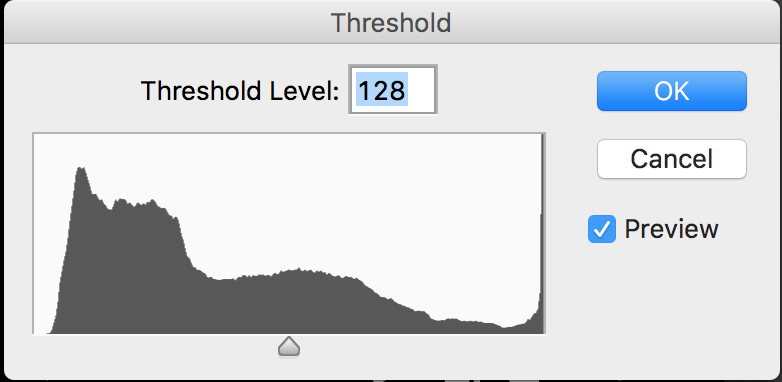
- With the figure selected, go to Image> Adjustments> Threshold
- When this box appears, adjust the level until you are satisfied with the results:
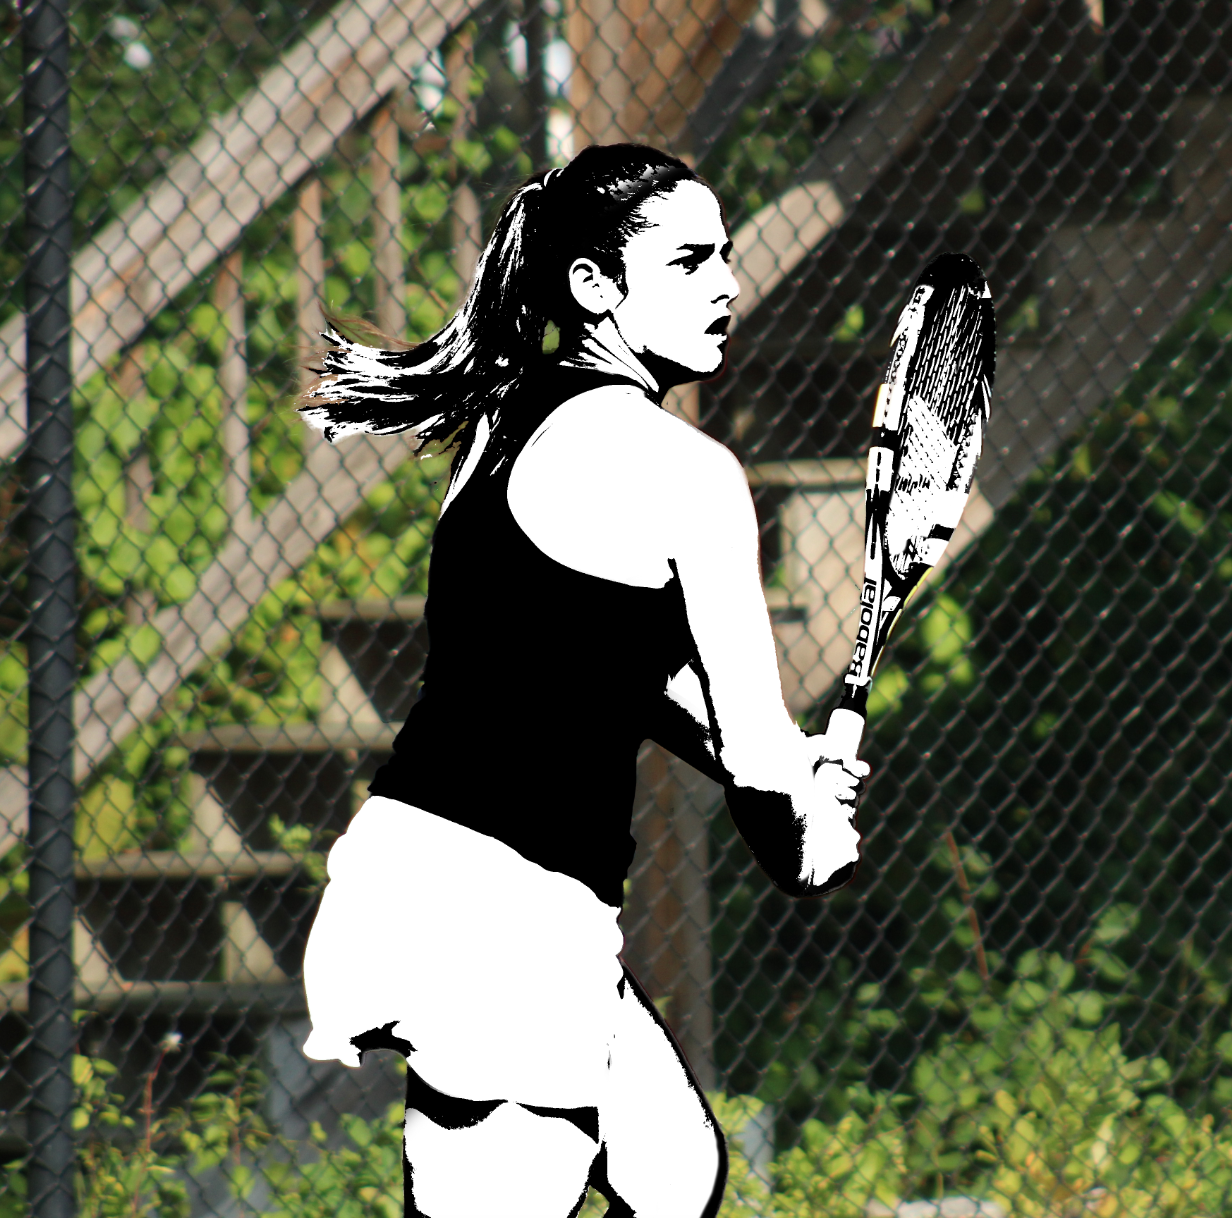
- Remove the background
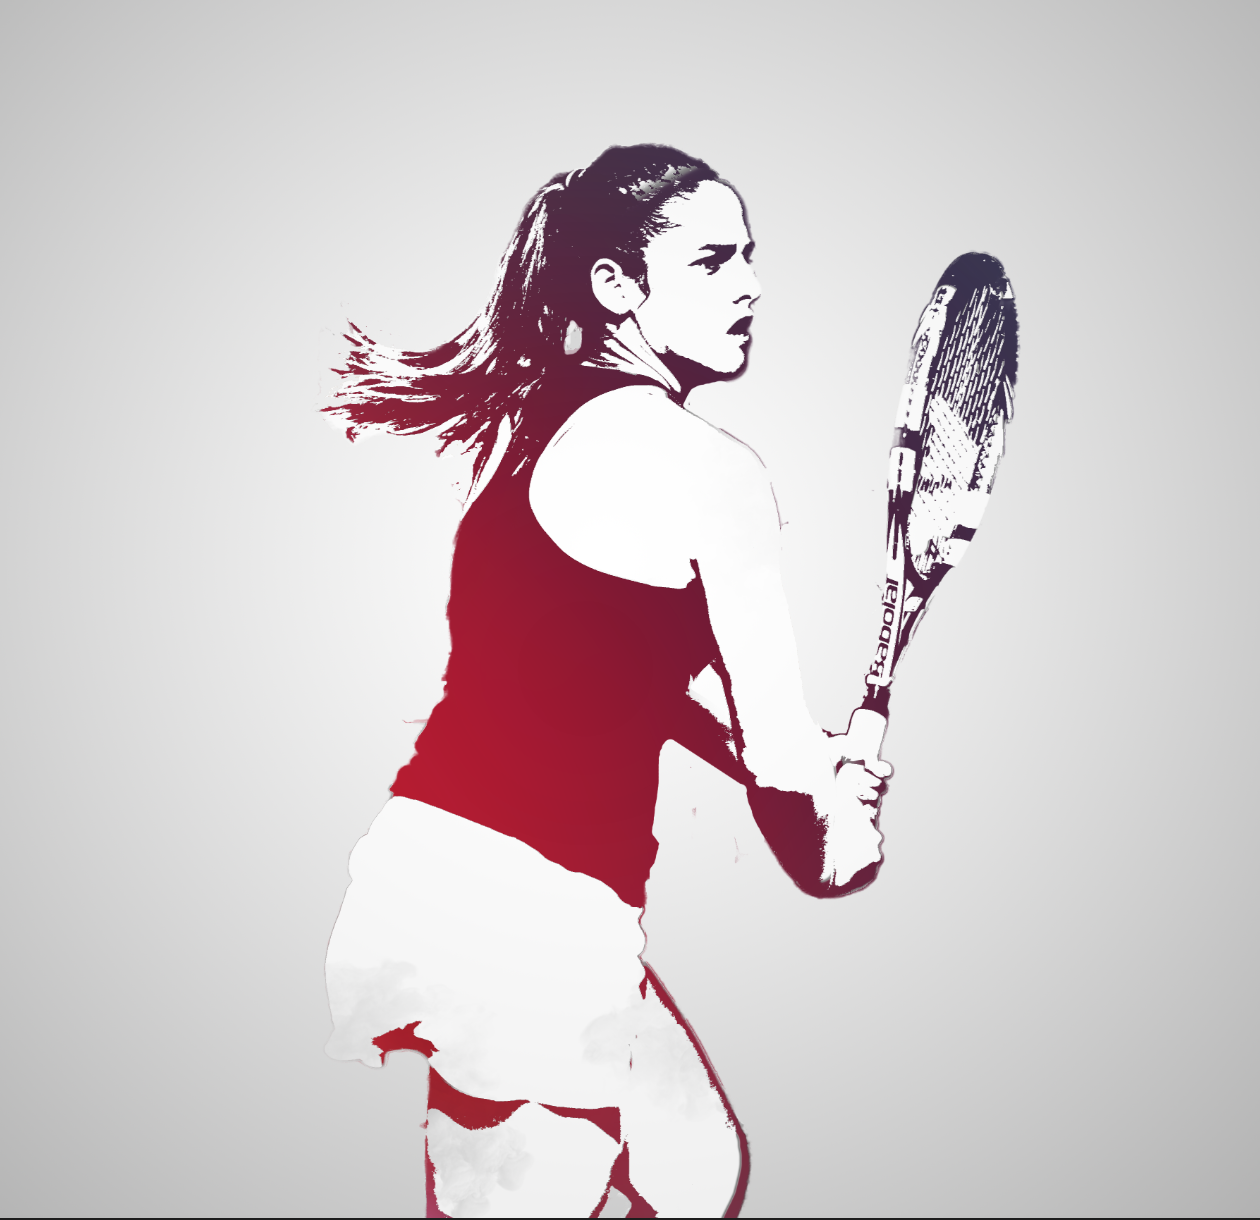
- Go to Select> Color Rage and select Black
- Open a new file with a radius gradient background from white to black
- Move the color selection of the figure to the gradient background
- In a new layer on top, create a gradient with the colors that you like. In my case navy blue & red.
- Hold down the option key and click the gradient > Create a clipping mask. This is how it should look now:
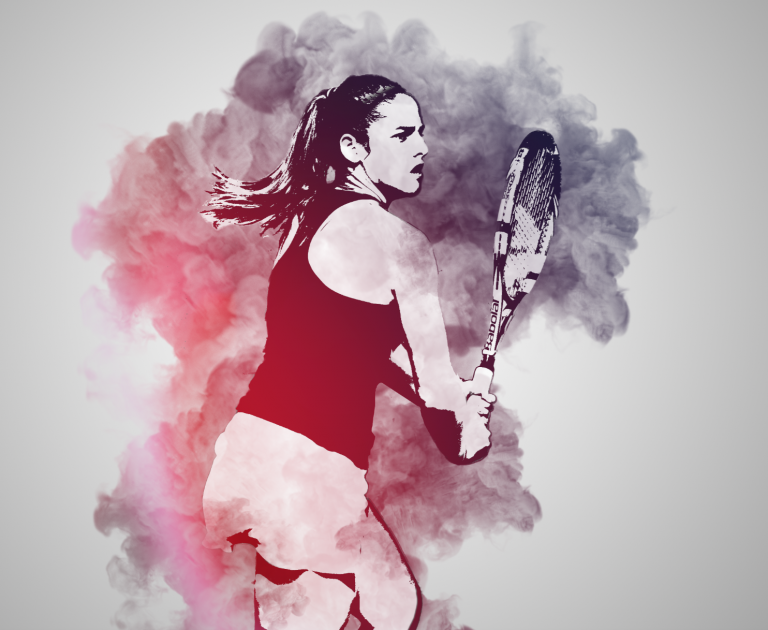
- For the smoke effect; get some smoke brushes
- In the layer of the figure, start painting with the smoke brushes. This part has to be carefully done so you get a cool and realistic effect.
I hope you liked this tutorial. If you would like me to do a certain tutorial that you would like to learn comment here or contact me.
Love your work, so amazeballs